This article will explain how to set attacking corners in Football Manager using the set piece creator. We will run through all the basics and explain all the options you have.
Importance of Attacking Corners
While some people don’t bother about their set pieces in Football Manager and simply use the default settings and instructions, most of you use the set piece creator to improve the results from corners. If we look at Football Manager and simulate some seasons, we found out that roughly 15% of the goals during a season are scored from attacking corners, showing the importance of corners (and set pieces).
If you manage to create a good attacking corner setup, you can easily score 15 to 20 goals per season. This could be the difference between a championship or second place and even the difference between avoiding relegation and losing the relegation battle.
Building Attacking Corners
Before we start the article we would like to emphasise that this article will NOT show you the best way to set attacking corners. This article is simply meant to explain the basics on how this system works.
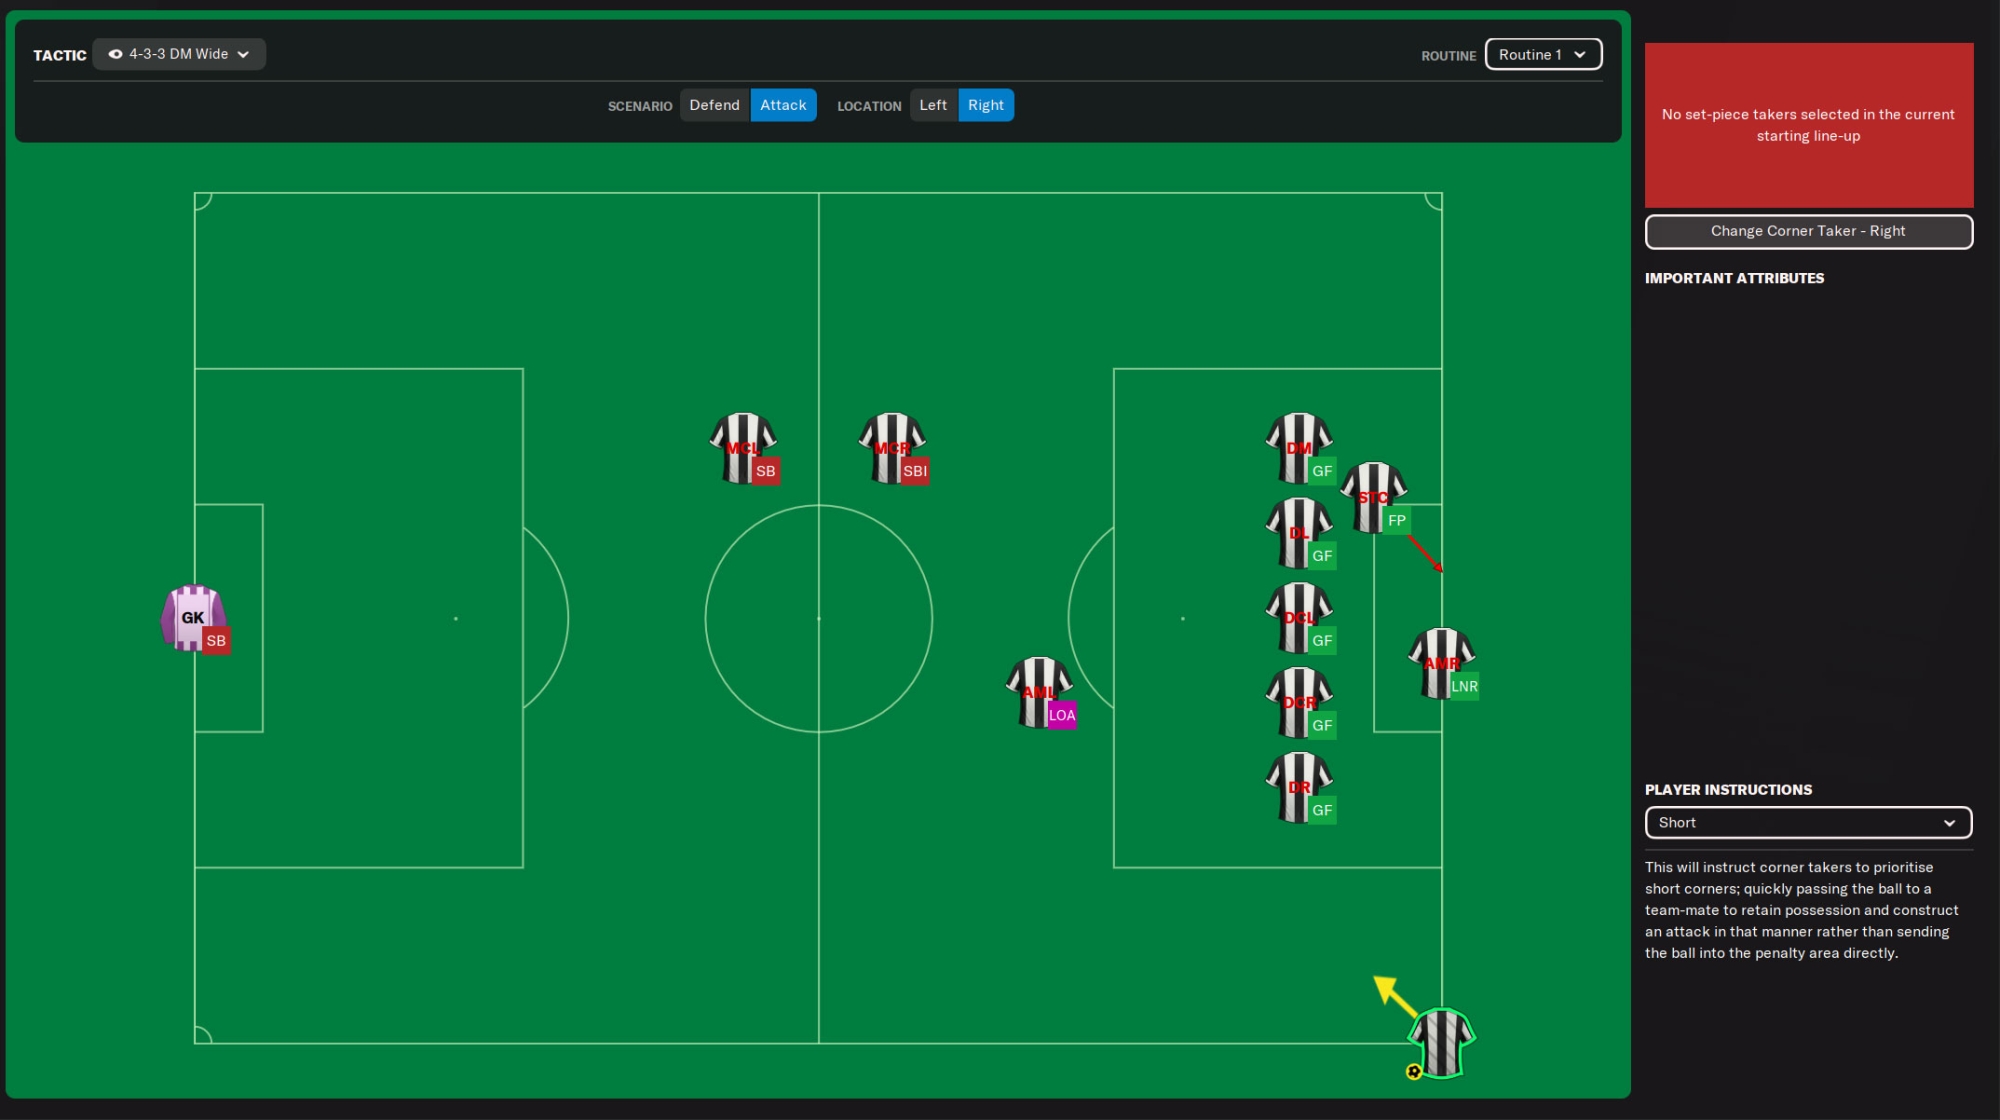
You will be able to find the set piece creator for corners at Tactics > Set Pieces > Corners. Then look for Scenario at the top and activate Attack.
This will take you to the starting screen of the set piece creator. Here you can see the pitch with the standard set of player instructions for attacking a corner.
On the top you can select your tactic (if you use more than one tactic), the scenario (defend or attack), the location (left of right) and the routine you want to edit (more on that later).
Set Piece Takers
Can be found at Tactics > Set Pieces > Set Piece Takers
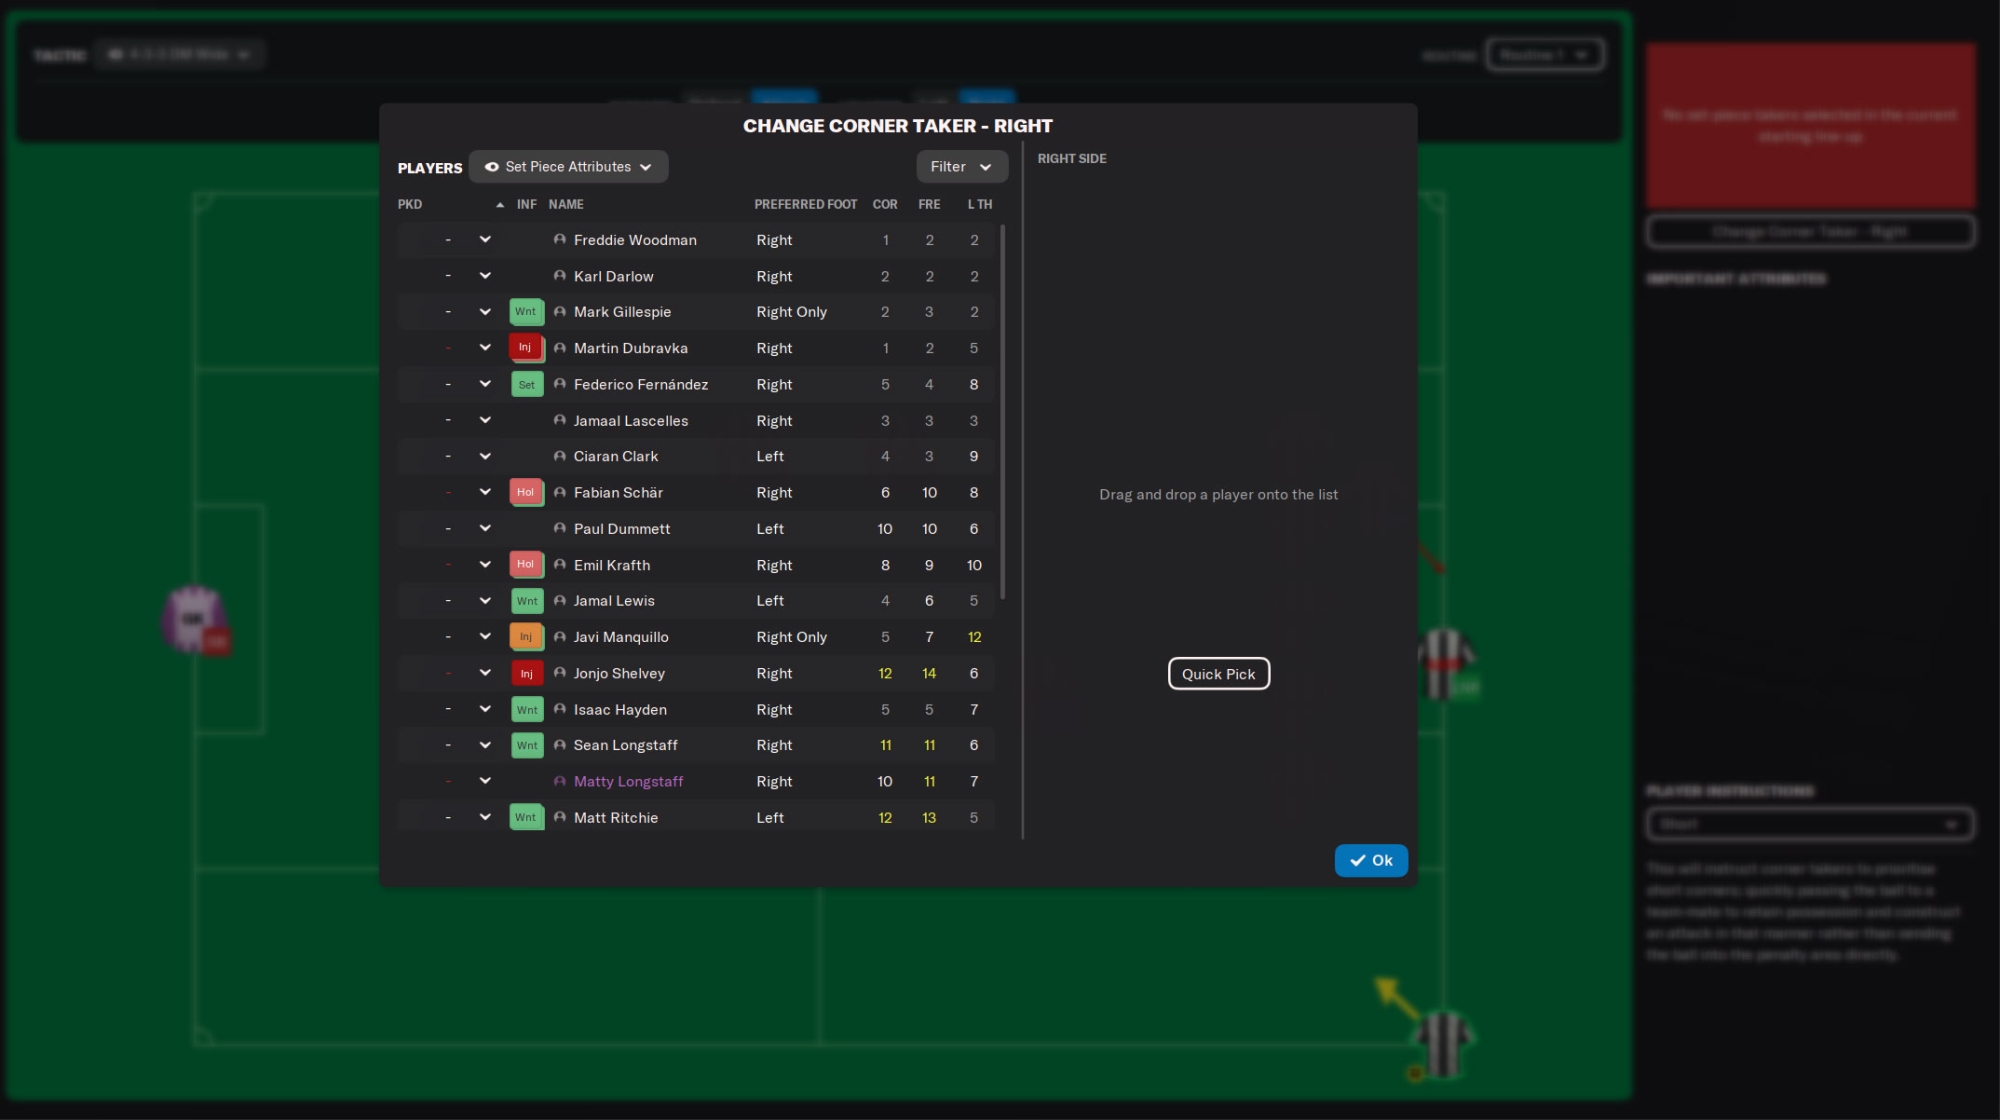
One of the first important decisions you will have to make is picking the right corner taker. The game recommends you only look at the Corners attribute, but that is a little short-sighted. A player will also need Technique in order to place the ball in the correct area. You could also look for Player Traits such as Curls the Ball.
How to select your corner taker
Add the column Technique to the Set Piece taker selection screen and then simply sort the columns (tip: use hold shift and tap multiple columns you want to sort). Then simply check the players who have the best attributes. However, you should also take into consideration that the best corner taker could also be your best header or finisher.
Now look at the player’s preferred foot. This way you can decide if you want an inswinging or outswinging corner. There isn’t a ‘best setting’ for the type of corner, but keep in mind your player instructions on the pitch should match the type of corner you would like to use. For example an inswinging corner will place the ball closer to the goal and more players in the six-yard box are needed.
Another thing to keep in mind is that the set piece creator requires you to place players into a position based on their playing positions on the field. The player who takes the corner will not be replaced in the corner tactic and his position on the pitch will not be used. It is therefore advised to pick corner takers that do not hold a key position in your attacking corner tactic.
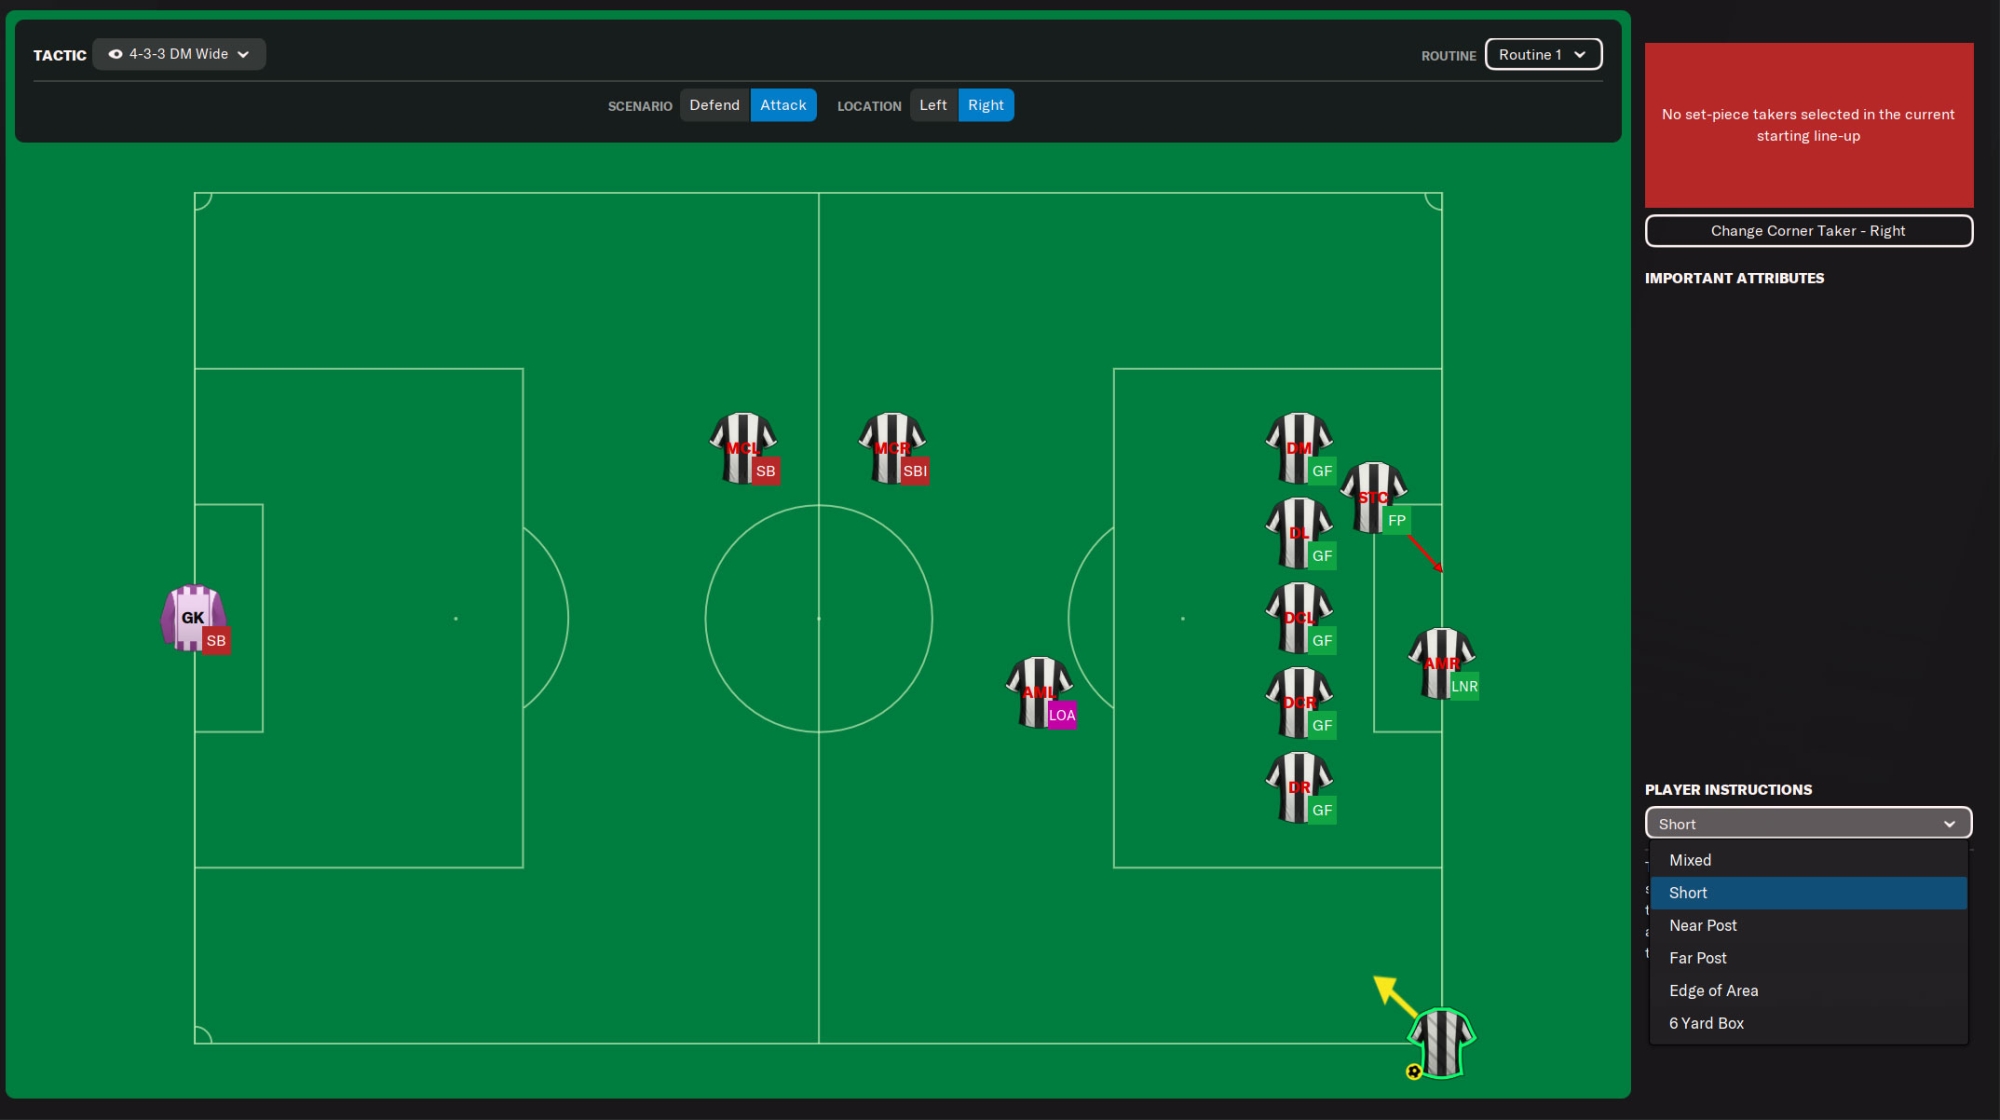
Set Piece delivery options
On the set piece creator screen click the corner taker. You should then see the menu on the right change and this will give you the options for the taker.
You have the following options to select from:
Mixed
This will instruct the corner taker to mix his delivery and not stick to one strategy. This could be a handy option if you want to surprise your opponent with each corner, but we feel you should avoid this option. You shouldn’t trust the judgement of the AI and always rely on your own choices.
Short
This will instruct the corner taker to take a short corner. He will pass the ball (quickly) to a nearby teammate to try and deliver the ball in a different way than a corner. This is a useful option if you like to surprise your opponent as this could lead to a cross, dribble, back pass or simply a way to run down the clock to stall time.
Near Post
This will instruct the taker to place his corner at the near post. A good instruction if you have a great header and instruct him to attack the first post.
Far Post
This will instruct the taker to place his corner at the far post. A good instruction if you have a great finisher and instruct him to attack the far post.
Edge of Area
This will instruct the corner taker to look for a player just outside of the penalty area. That particular player could then get a shot on goal or find a teammate with a short pass into the box.
Six-yard Box
This will instruct your corner taker to aim for the six-yard box and into the goalkeeper area. This delivery style is one of the most used in Football Manager but it is also one of the least successful one. Most of the time this area is packed with defenders and it will allow a good goalkeeper to catch the ball or punch it away out of danger.
Which Delivery should I Pick?
We suggest you should first decide on Player instructions and positions before deciding on the delivery type. Find out which instructions suit your players best and then decide how to exploit your strengths. Always try to find your best headers and/or finishers and base your delivery style on your players and not the other way around.
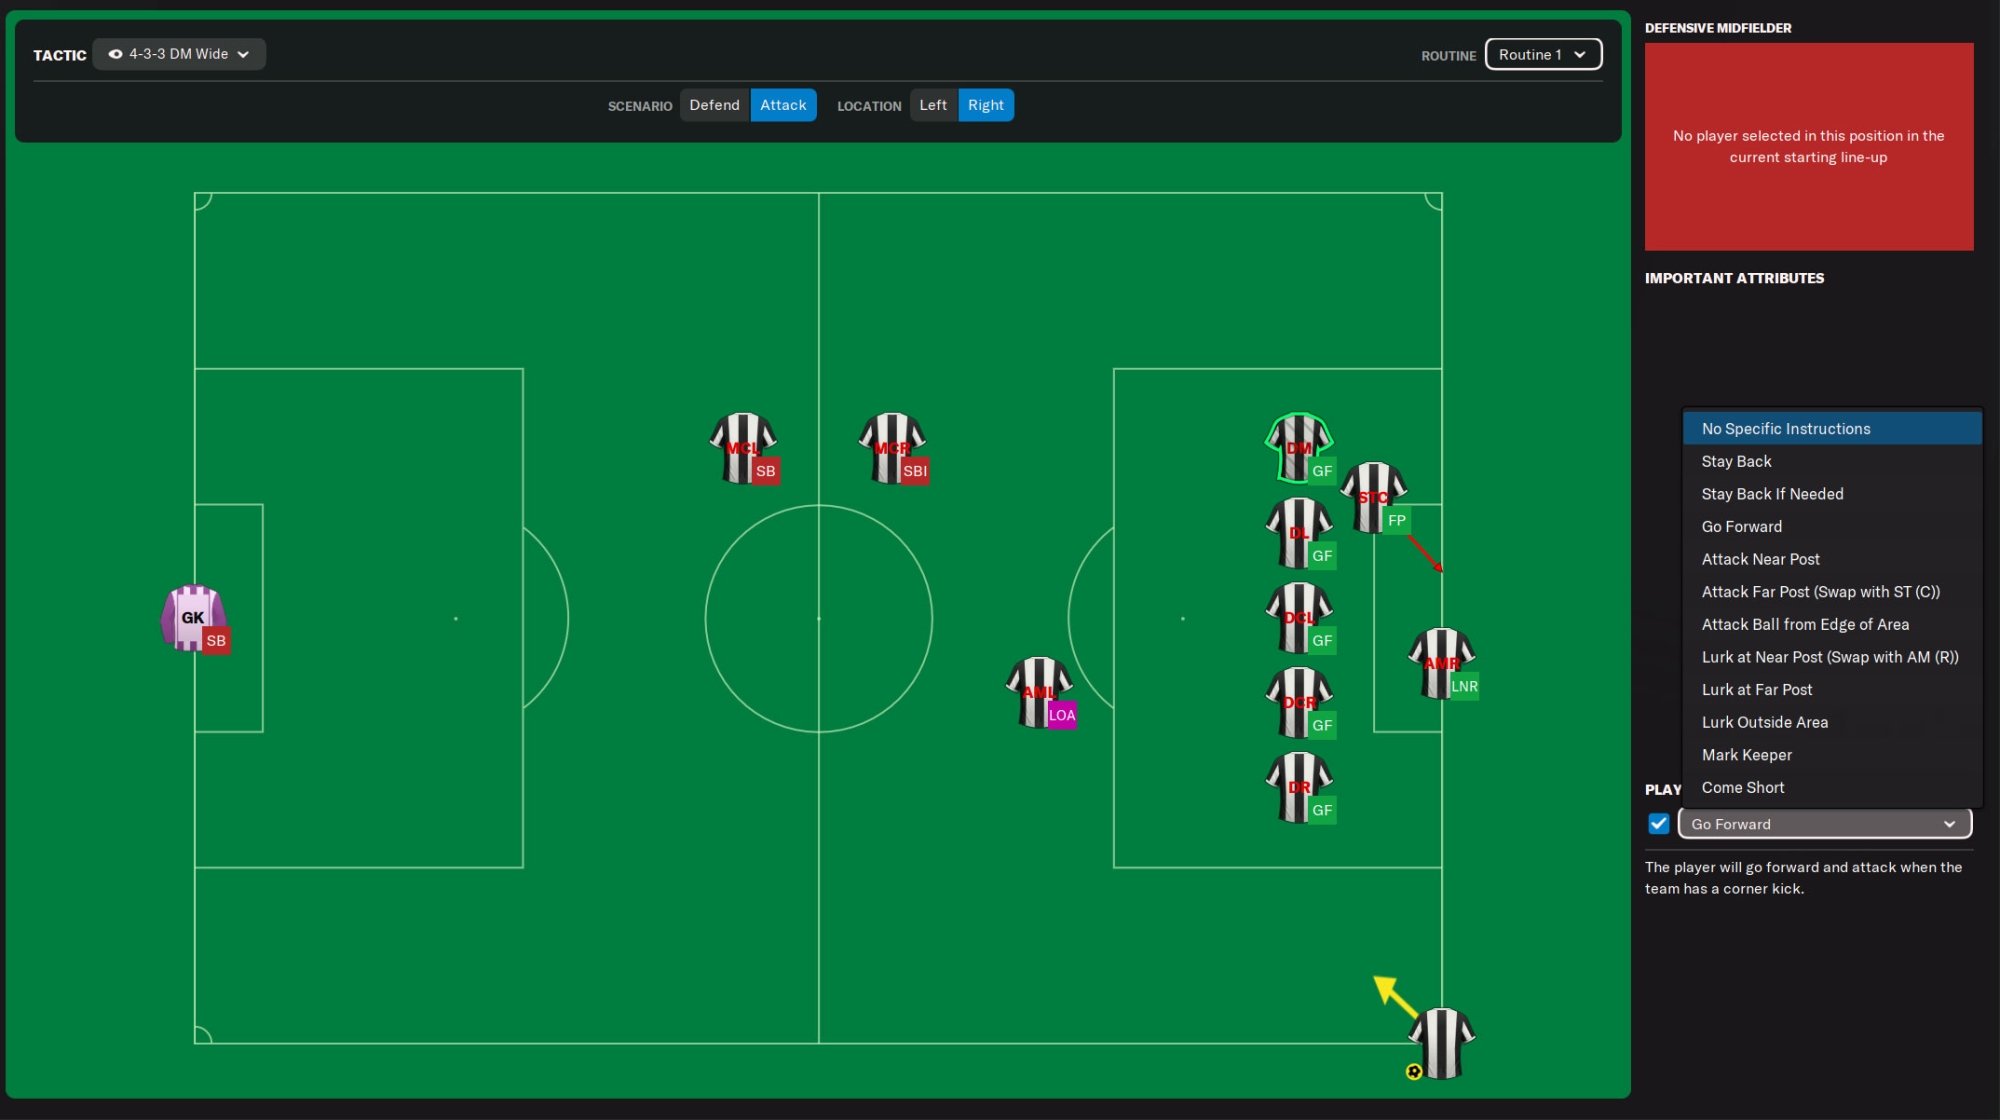
Player Instructions
Now we move over to the most interesting part of creating attacking corners: Player instructions. There are a lot of options available and we will run through all the instructions and explain what they do and which attributes to look for.
No Specific Instructions
This will place the player in a random position in the opponent's box. Avoid this as you don’t want players to pop up in random places.
Stay Back
This will instruct players to stay back at all times to focus on their defensive duties. This option is usually used for the smaller players or players who can’t head or finish a ball properly. Normal players to use here are Fullbacks as they tend to have the pace and defensive qualities to stop a counter attack.
Attributes: Marking, Tackling, Decisions, Positioning, Teamwork, Acceleration and Pace.
Stay Back If Needed
This instruction gives your players a bit more freedom. A player will only stay back if he is needed there; in other words when an opponent stays forward. If that is not the case the players will move forward to help their teammates. Not advised to take this option as this could leave certain areas on the pitch open if a player does decide to move back.
Attributes: Marking, Tackling, Decisions, Positioning, Teamwork, Acceleration and Pace.
Go Forward
This will simply instruct players to move forward and decide on their own where to position themselves. It can be compared to the ‘No Specific Instructions’. Use this if you have all key positions filled and simply want some extra bodies in the penalty-area.
Attributes: FInishing, Heading, Bravery, Decisions, Off the Ball, Jumping Reach and Strength.
Attack Near Post
This will instruct a player to attack the near post. This is an ideal setting if you instruct your corner taker to aim for the near post. The player could then either head the ball on goal or try a flick-on to the player(s) behind him in the area. You could also set him as a decoy to free up space just between the near post and the centre of the area.
Attributes: FInishing, Heading, Bravery, Decisions, Off the Ball, Jumping Reach and Strength.
Attack Far Post
This will instruct a player to attack the far post. Handy if you aim your corner at the far post but also if your player at the first post flicks the ball on or misses the ball.
Attributes: FInishing, Heading, Bravery, Decisions, Off the Ball, Jumping Reach and Strength.
Attack Ball from Edge of Area
This will instruct a player to lurk just outside of the area and move into the penalty area. Ideal if an opponent doesn’t have many players covering the edge of the area. You can combine this instruction with a player who will attack the near post as a decoy to free up space behind him.
Attributes: Finishing, Heading, Anticipation, Off the Ball, Jumping Reach and Strength.
Lurk at Near Post
This will instruct a player to look for a flick-on at the near post. Also a useful instruction if you want to block the goalkeepers view and simply add more bodies to the near post area.
Attributes: FInishing, Heading, Bravery, Decisions, Off the Ball, Jumping Reach and Strength.
Lurk at Far Post
This will instruct a player to look to head the ball back from the far post. Also a useful instruction to occupy the opponent’s defenders and simply crowd the area on the far post in an attempt to create some chaos.
Attributes: FInishing, Heading, Bravery, Decisions, Off the Ball, Jumping Reach and Strength.
Lurk Outside Area
This will instruct players to look for any loose balls after the corner kick has been taken from either a flick-on or attempt to clear the ball by the opponent. If you want this instruction to work you will need to clear space for the players outside the area. Have players attack the near and far posts to free up the space outside of the six-yard box in the centre. Another good thing about this instruction is that these players will look to stop counter attack possibilities.
Attributes: Finishing, First Touch, Long Shots, Passing, Technique, Decisions, Anticipation, Bravery, Strength.
Mark Keeper
This will instruct a player to stand in front of the opposing goalkeeper in order to block his view or movement. This could be a good instruction if you want your corner taker to aim the ball into the six-yard box. Another good option is that this player will block the goalkeeper’s view when you aim the ball towards the edge of the area for one of your players to take a long range shot (be wary of offside though).
Attributes: Finishing, Heading, Bravery, Decisions, Off the Ball, Jumping Reach and Strength.
Come Short
This will instruct a player to offer a short passing option to the corner taker. You can also use this to draw a defender away from the area, freeing up some extra space (possibly at the near post). This player could also be useful to sweep up cleared balls to the side to cross them back into the area.
Attributes: Crossing, Dribbling, First Touch, Passing, Technique, Anticipation and Decisions.
Corner Routines
Since a couple of versions ago you are able to use ‘Routines’ for your set pieces. This simply means you can have more than one set of instructions for your team and your team will switch between these routines throughout a match. You can create up to three different routines and you can Save, Load or Remove routines from within the set piece creator.
While we advised against using corner routines with defending corners, we love to use them with attacking corners. The team will switch between three routines during a match and that could surprise your opponent. Important to remember is that you can’t influence which corner routine your team uses throughout a match. Also, the corner routines aren’t necessary to use. If you have one successful routine you should simply stick with that one routine.
Conclusion
While some of you can’t be bothered with setting instructions for corners and other set pieces, they can really earn you some extra goals and points during a season. These points could easily mean the difference between a championship, playoff spot or survival. The attacking corner could earn you 15-20 goals each season if you use them properly. In any case: always look at the players you have on your squad before making a decision on how to set up your corner routine(s).
Also read our other Set Piece Guide on Defending Corners